Note: Custom Reports are available as a part of Common Assessments add-on. To access this feature and learn more about Common Assessments add-on and the Schools & Districts plan, please email sales@wayground.com
A Multi-Assessment Analysis report compares student performance across two or more Wayground or external assessments (iReady, NWEA MAP, Renaissance Star, state tests, etc.) in one view.
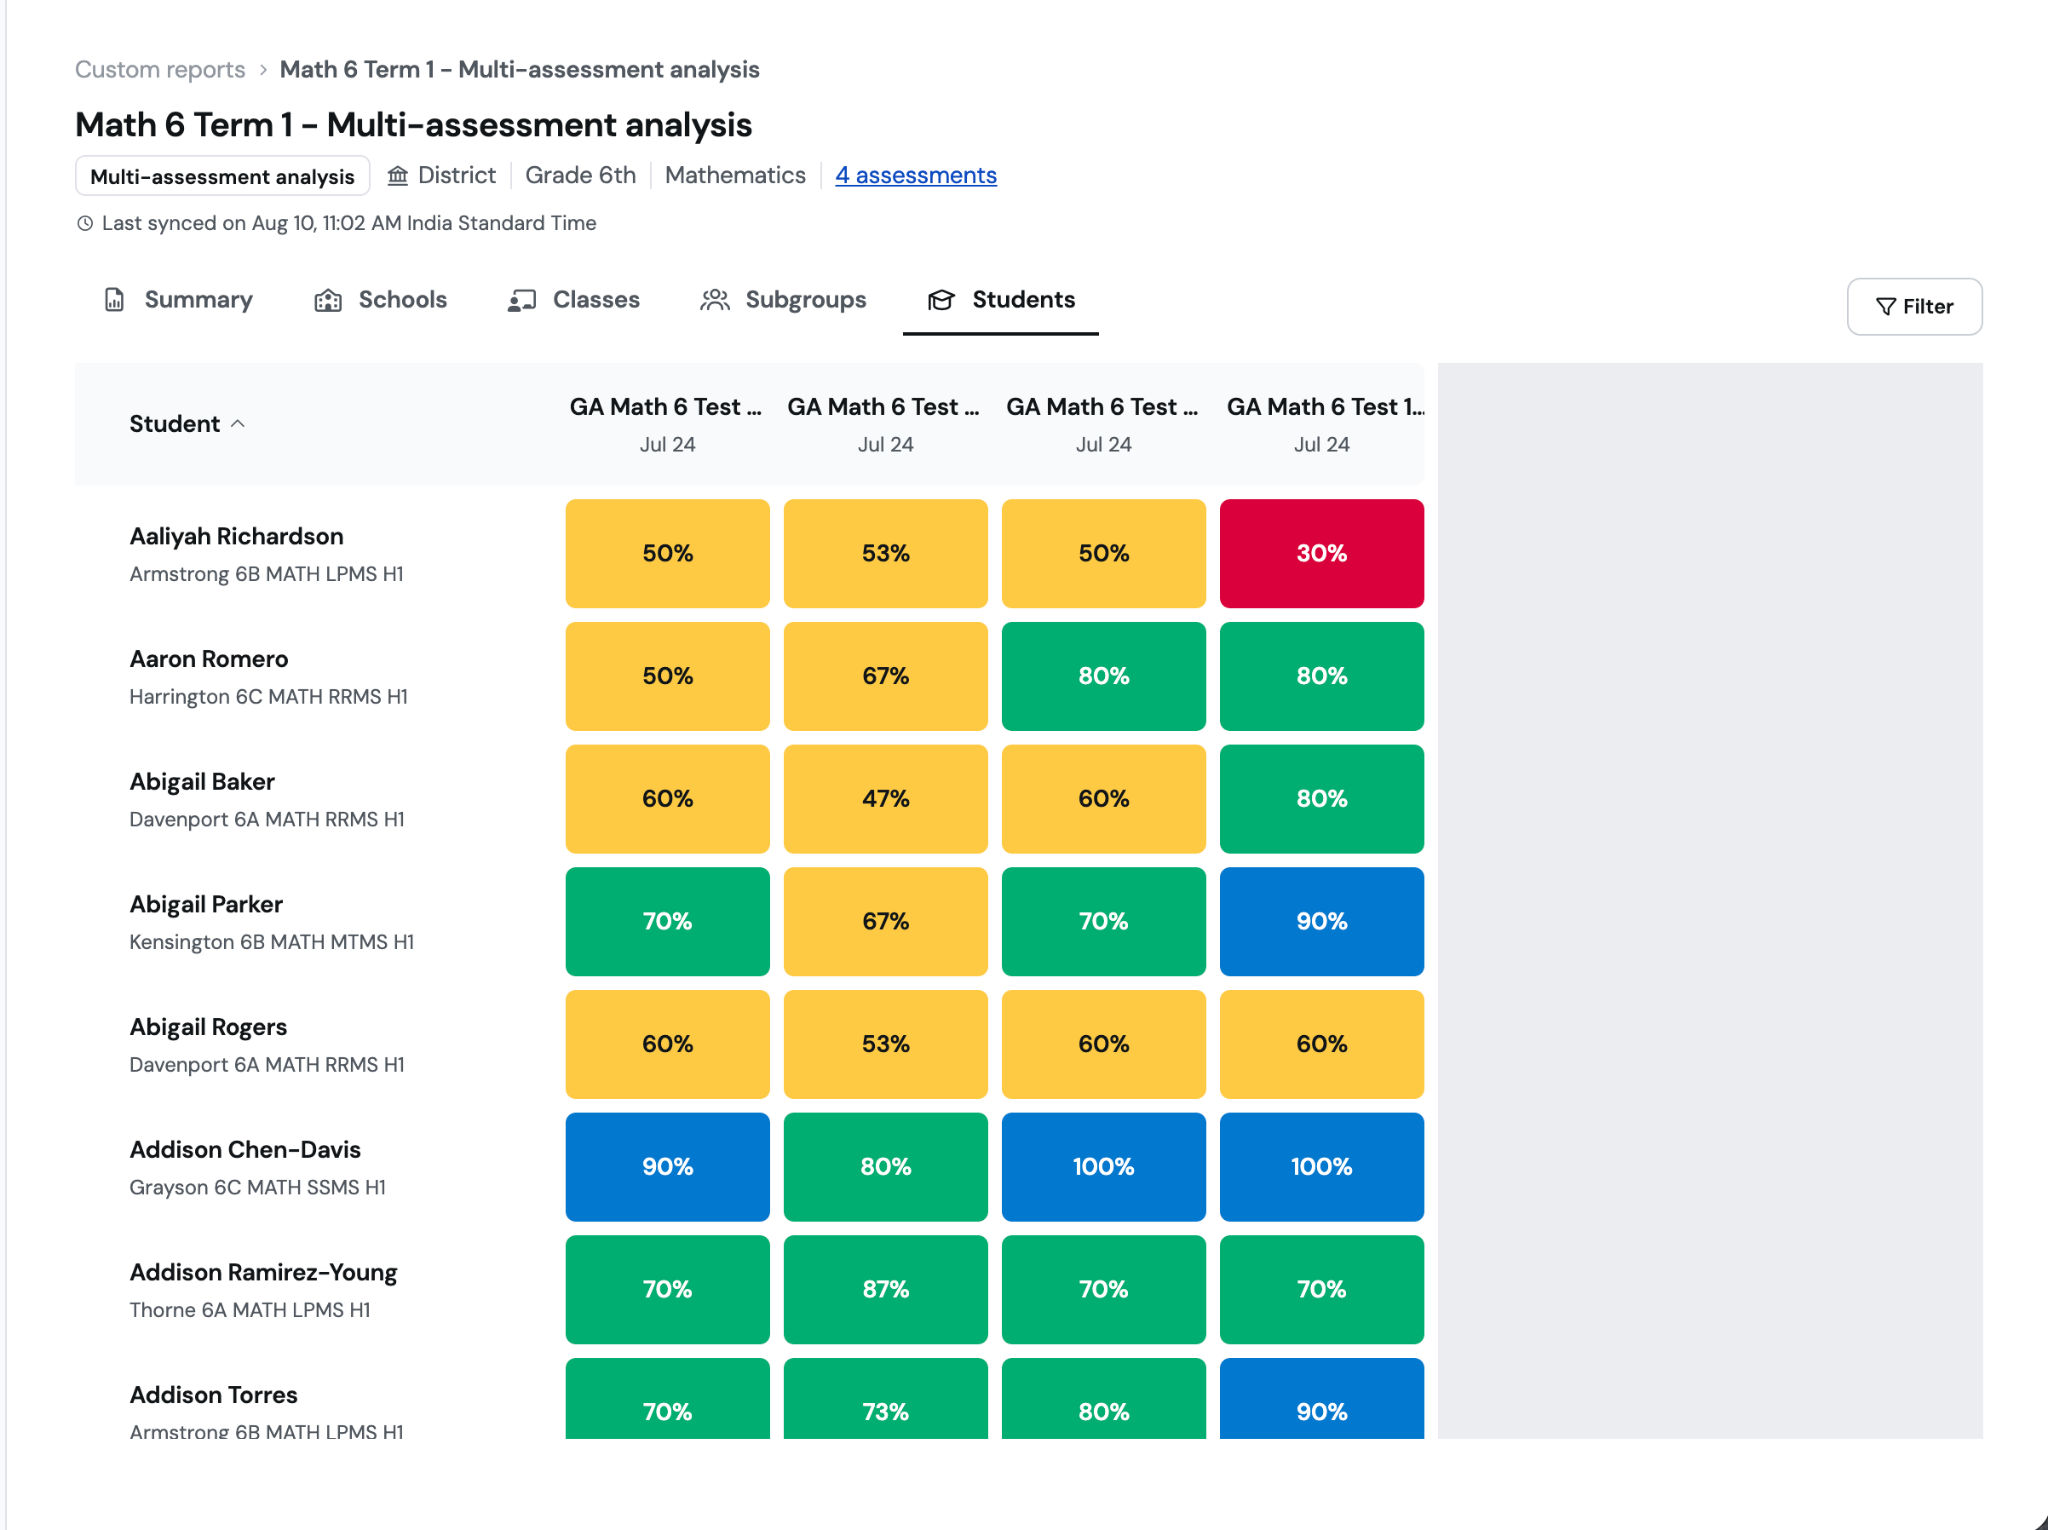
For a quick start guide, refer to this help center article: [Admins] [Quick Start] Create a Multi-Assessment Analysis Report
Step 1: Name your report and select the report type
To begin:
Go to Sessions → Custom Reports
Click Create new report
Enter a descriptive name
Select “Multi-assessment analysis.”
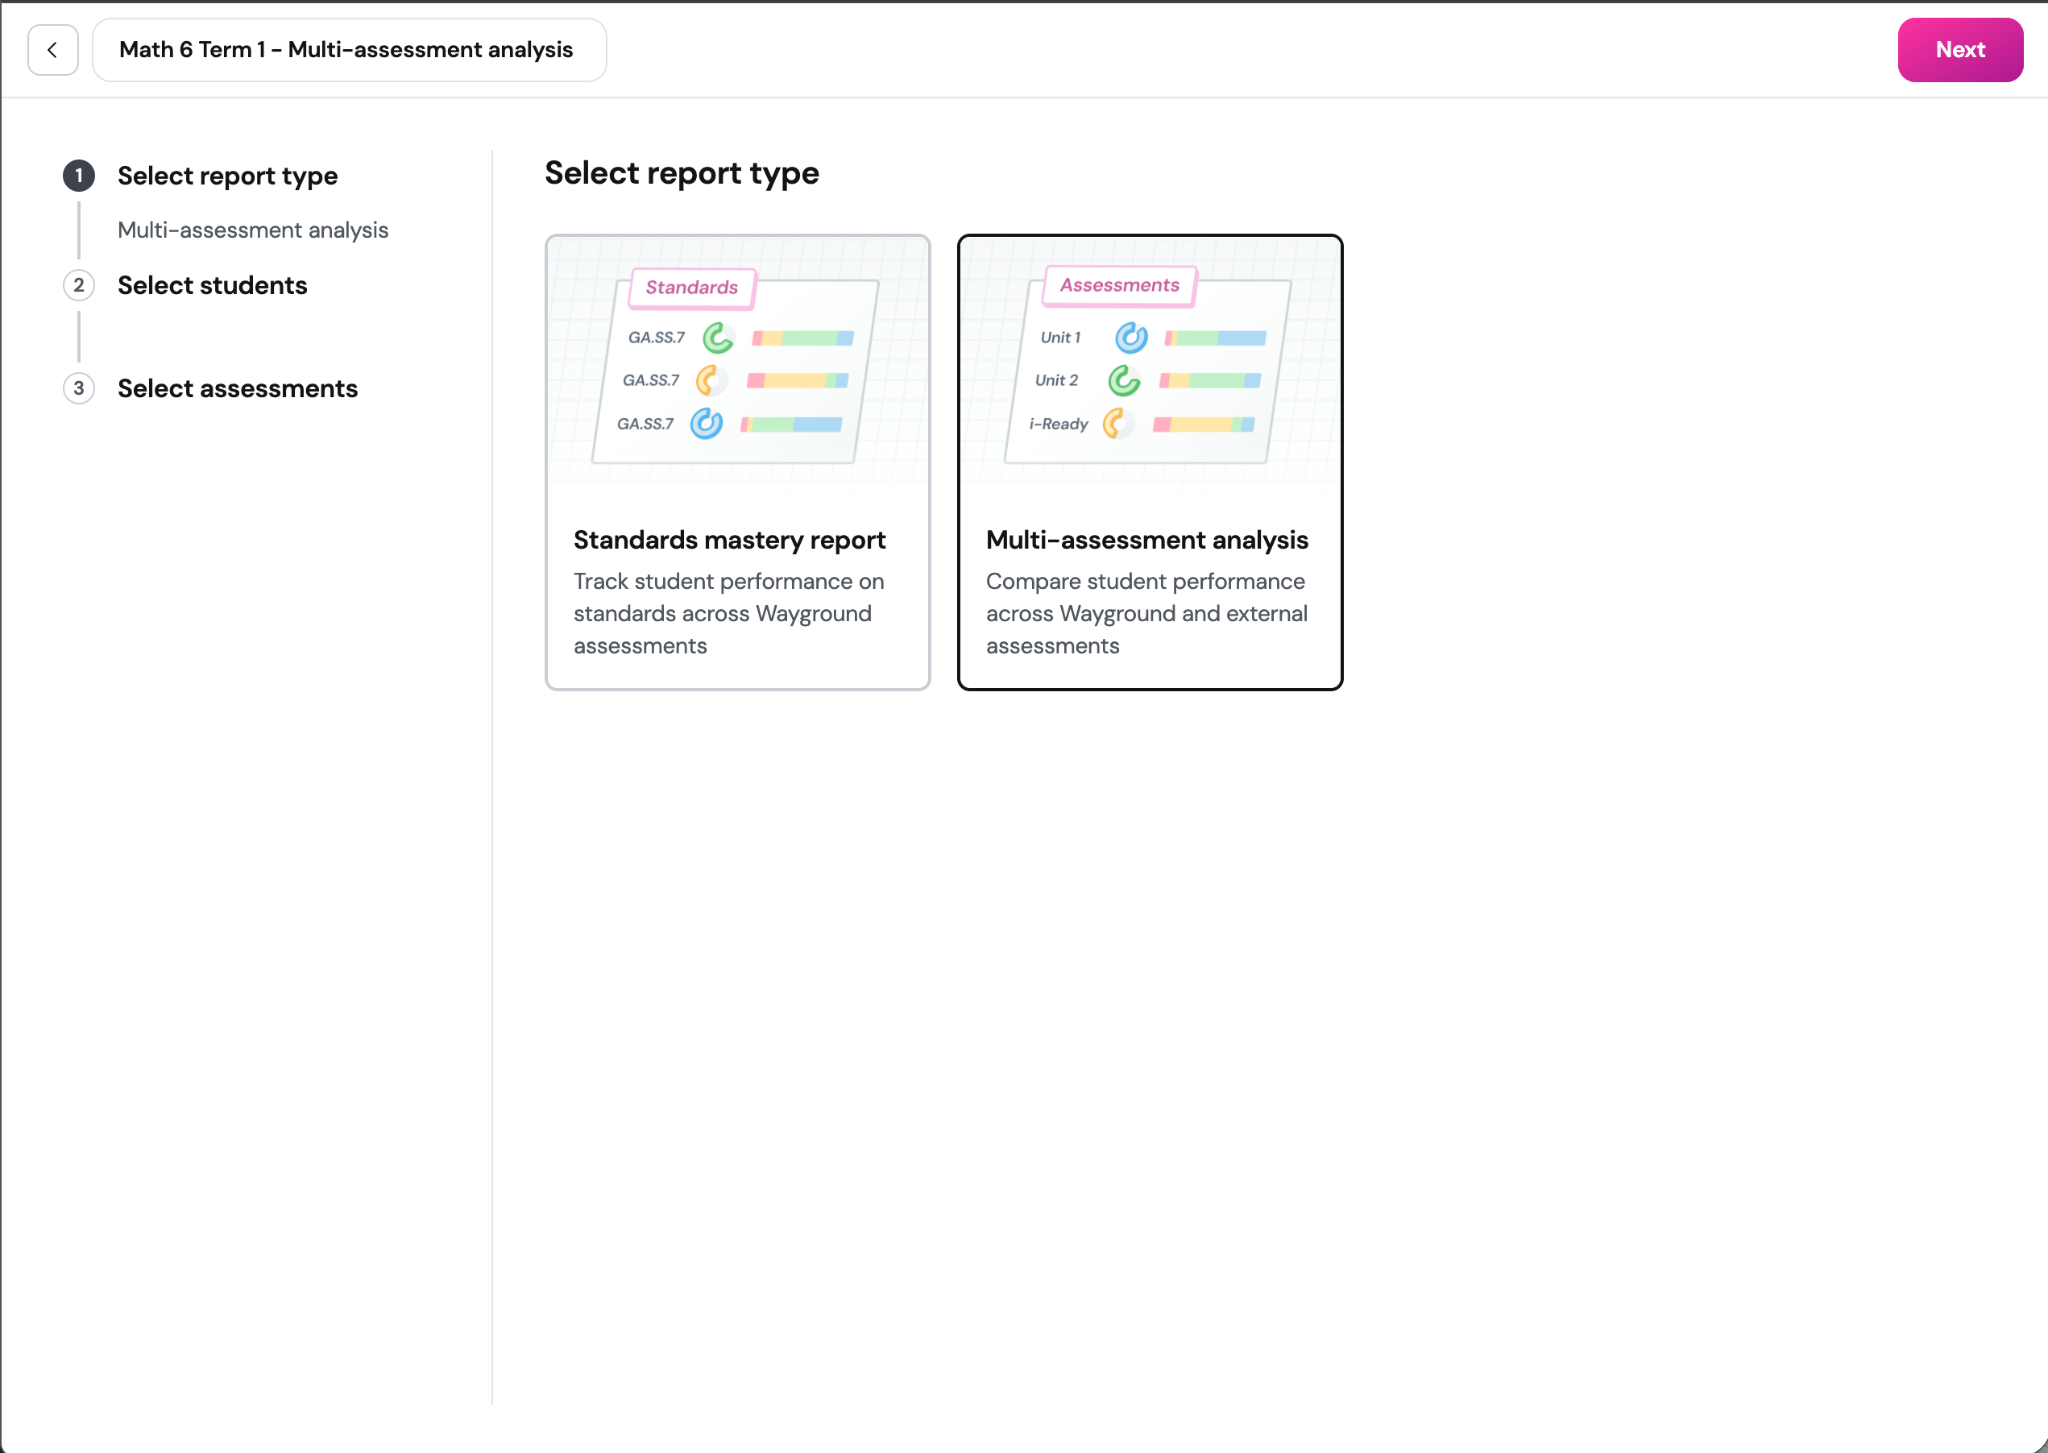
Step 2 - Part 1: Choose how student results are grouped
Students’ schools, classes, and subgroups may change over time, so this step lets you choose how Wayground should place each student’s results in the report’s school, class, and subgroup views.
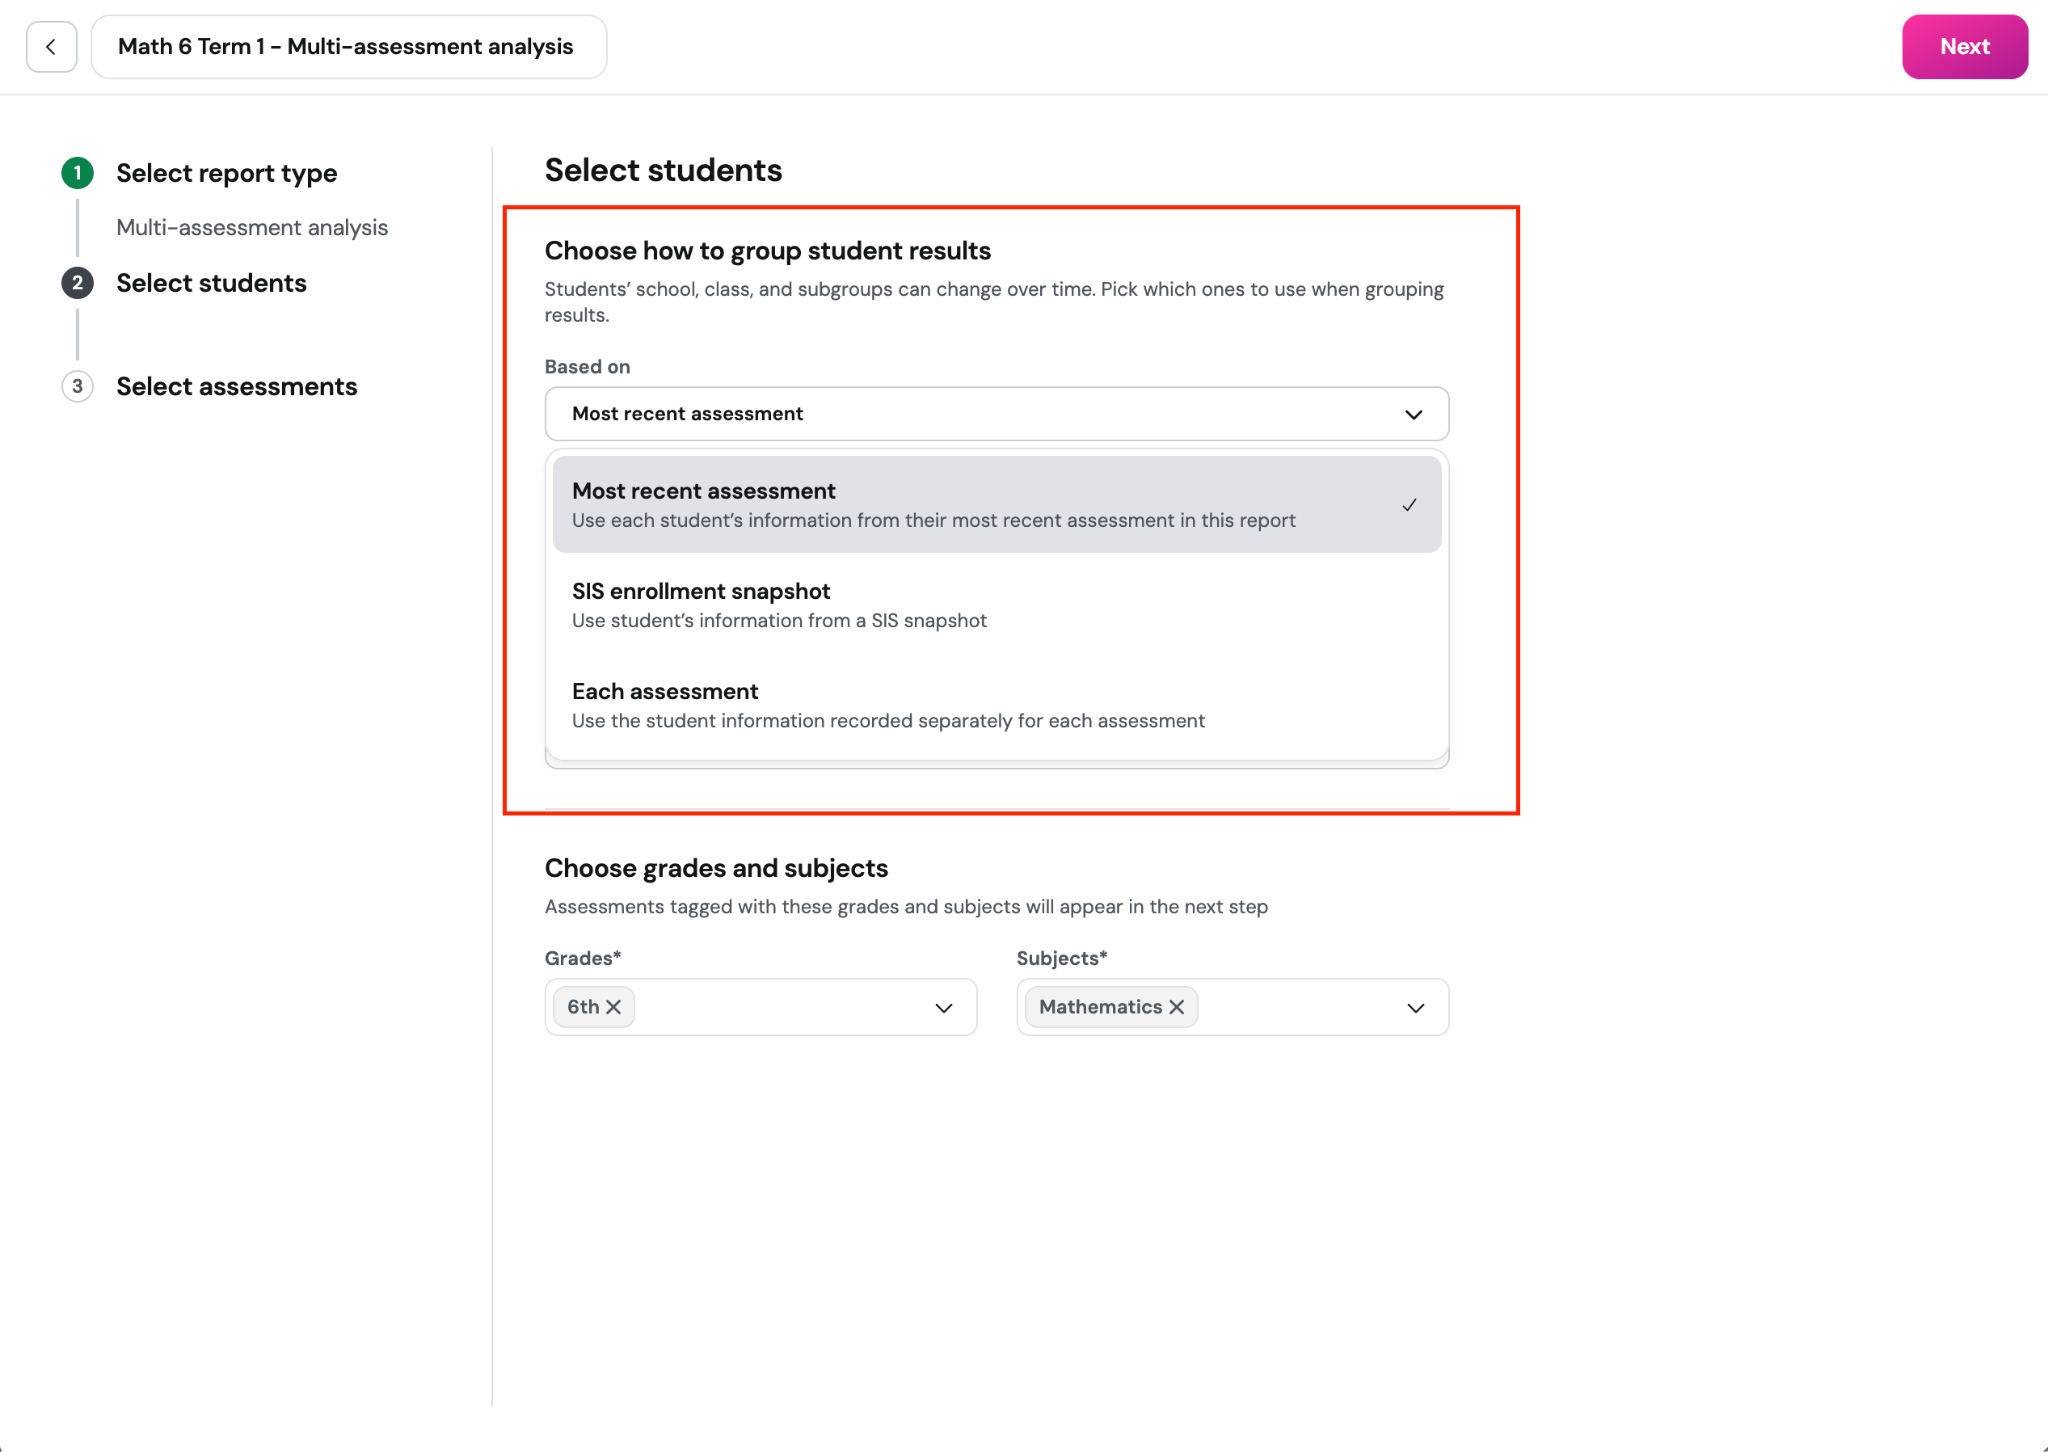
Most recent assessment
Choose this option to view each student under the school, class, and subgroup associated with their most recent selected assessment. Placement is determined student by student, so if a student missed the latest assessment, Wayground uses that student’s most recent participating assessment.
Use this strategy to identify where struggling students are currently, so you can direct support to the right schools and classes.
For example -
SIS enrollment snapshot
Available when your district connects Clever/Classlink to Wayground, choose this option when you want grouping to follow student rosters from a specific date.
After selection:
Choose a snapshot date. Wayground will use each student’s school and class assignments as they appeared on that date. The most recent available snapshot is selected by default.
Select one or more courses.
Select one or more terms.
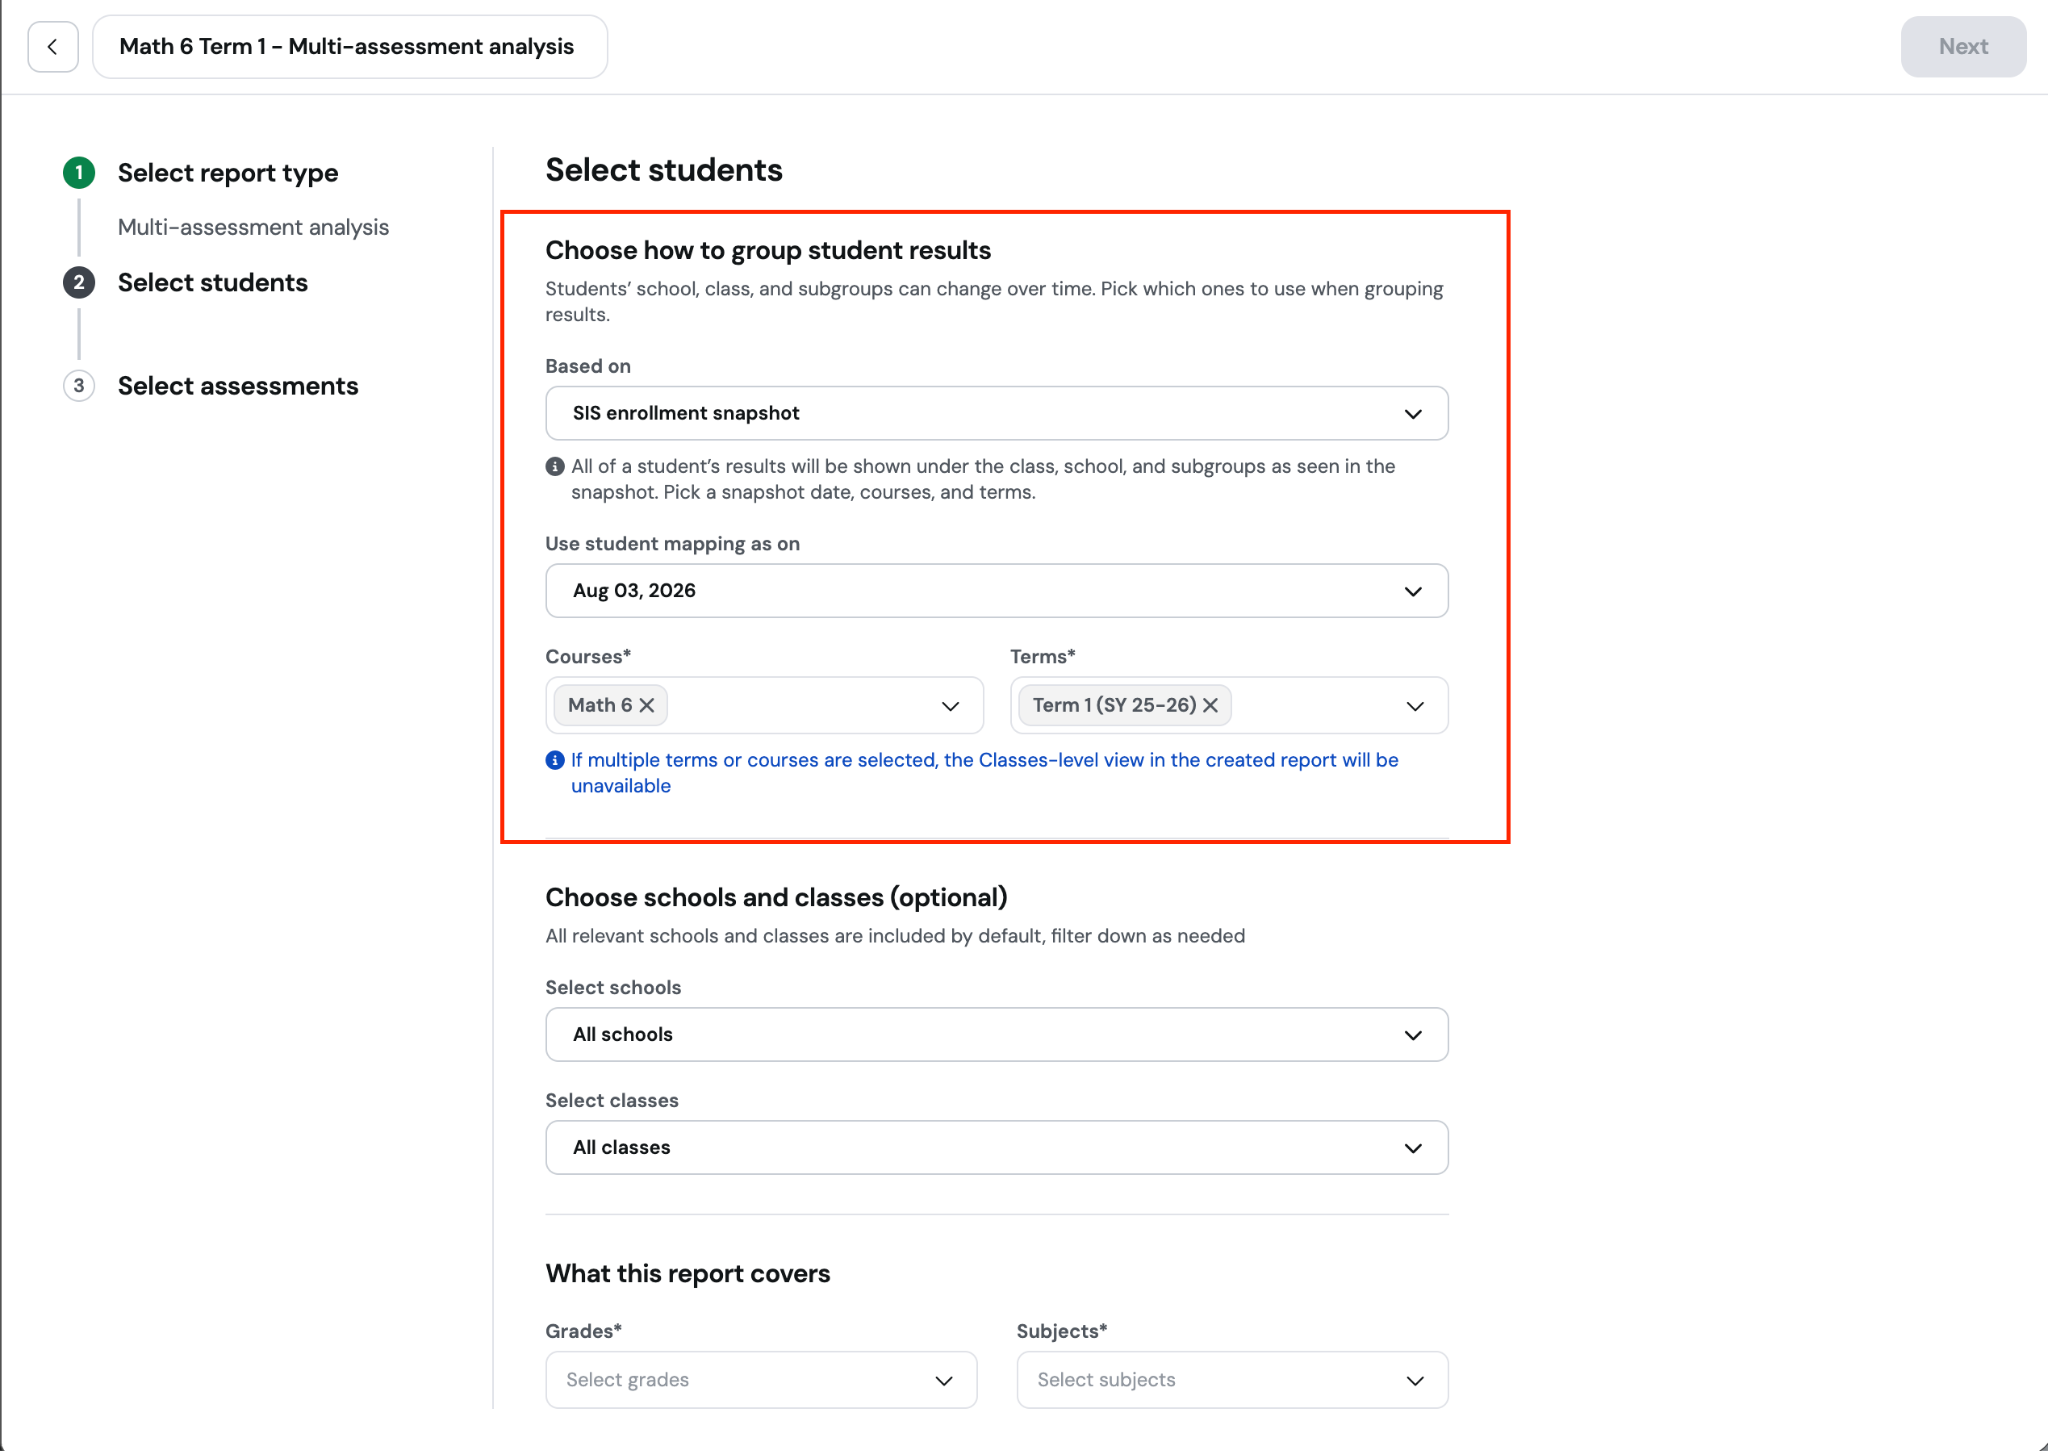
Note: If you select multiple courses or terms, a student may be associated with different classes across those selections. To prevent results from being attributed to or combined under the wrong groups, Wayground hides the class-level breakdown in the completed report. To view results by class, select one course and one term.
Each assessment
Choose this option when you want each result to remain with the school, class, and subgroups recorded when the student took that assessment. Placement is determined separately for every assessment, so the same student may appear in different groups across the report.
This option preserves the instructional context for each result and is useful to attribute results to instructional practices that worked/didn’t work.
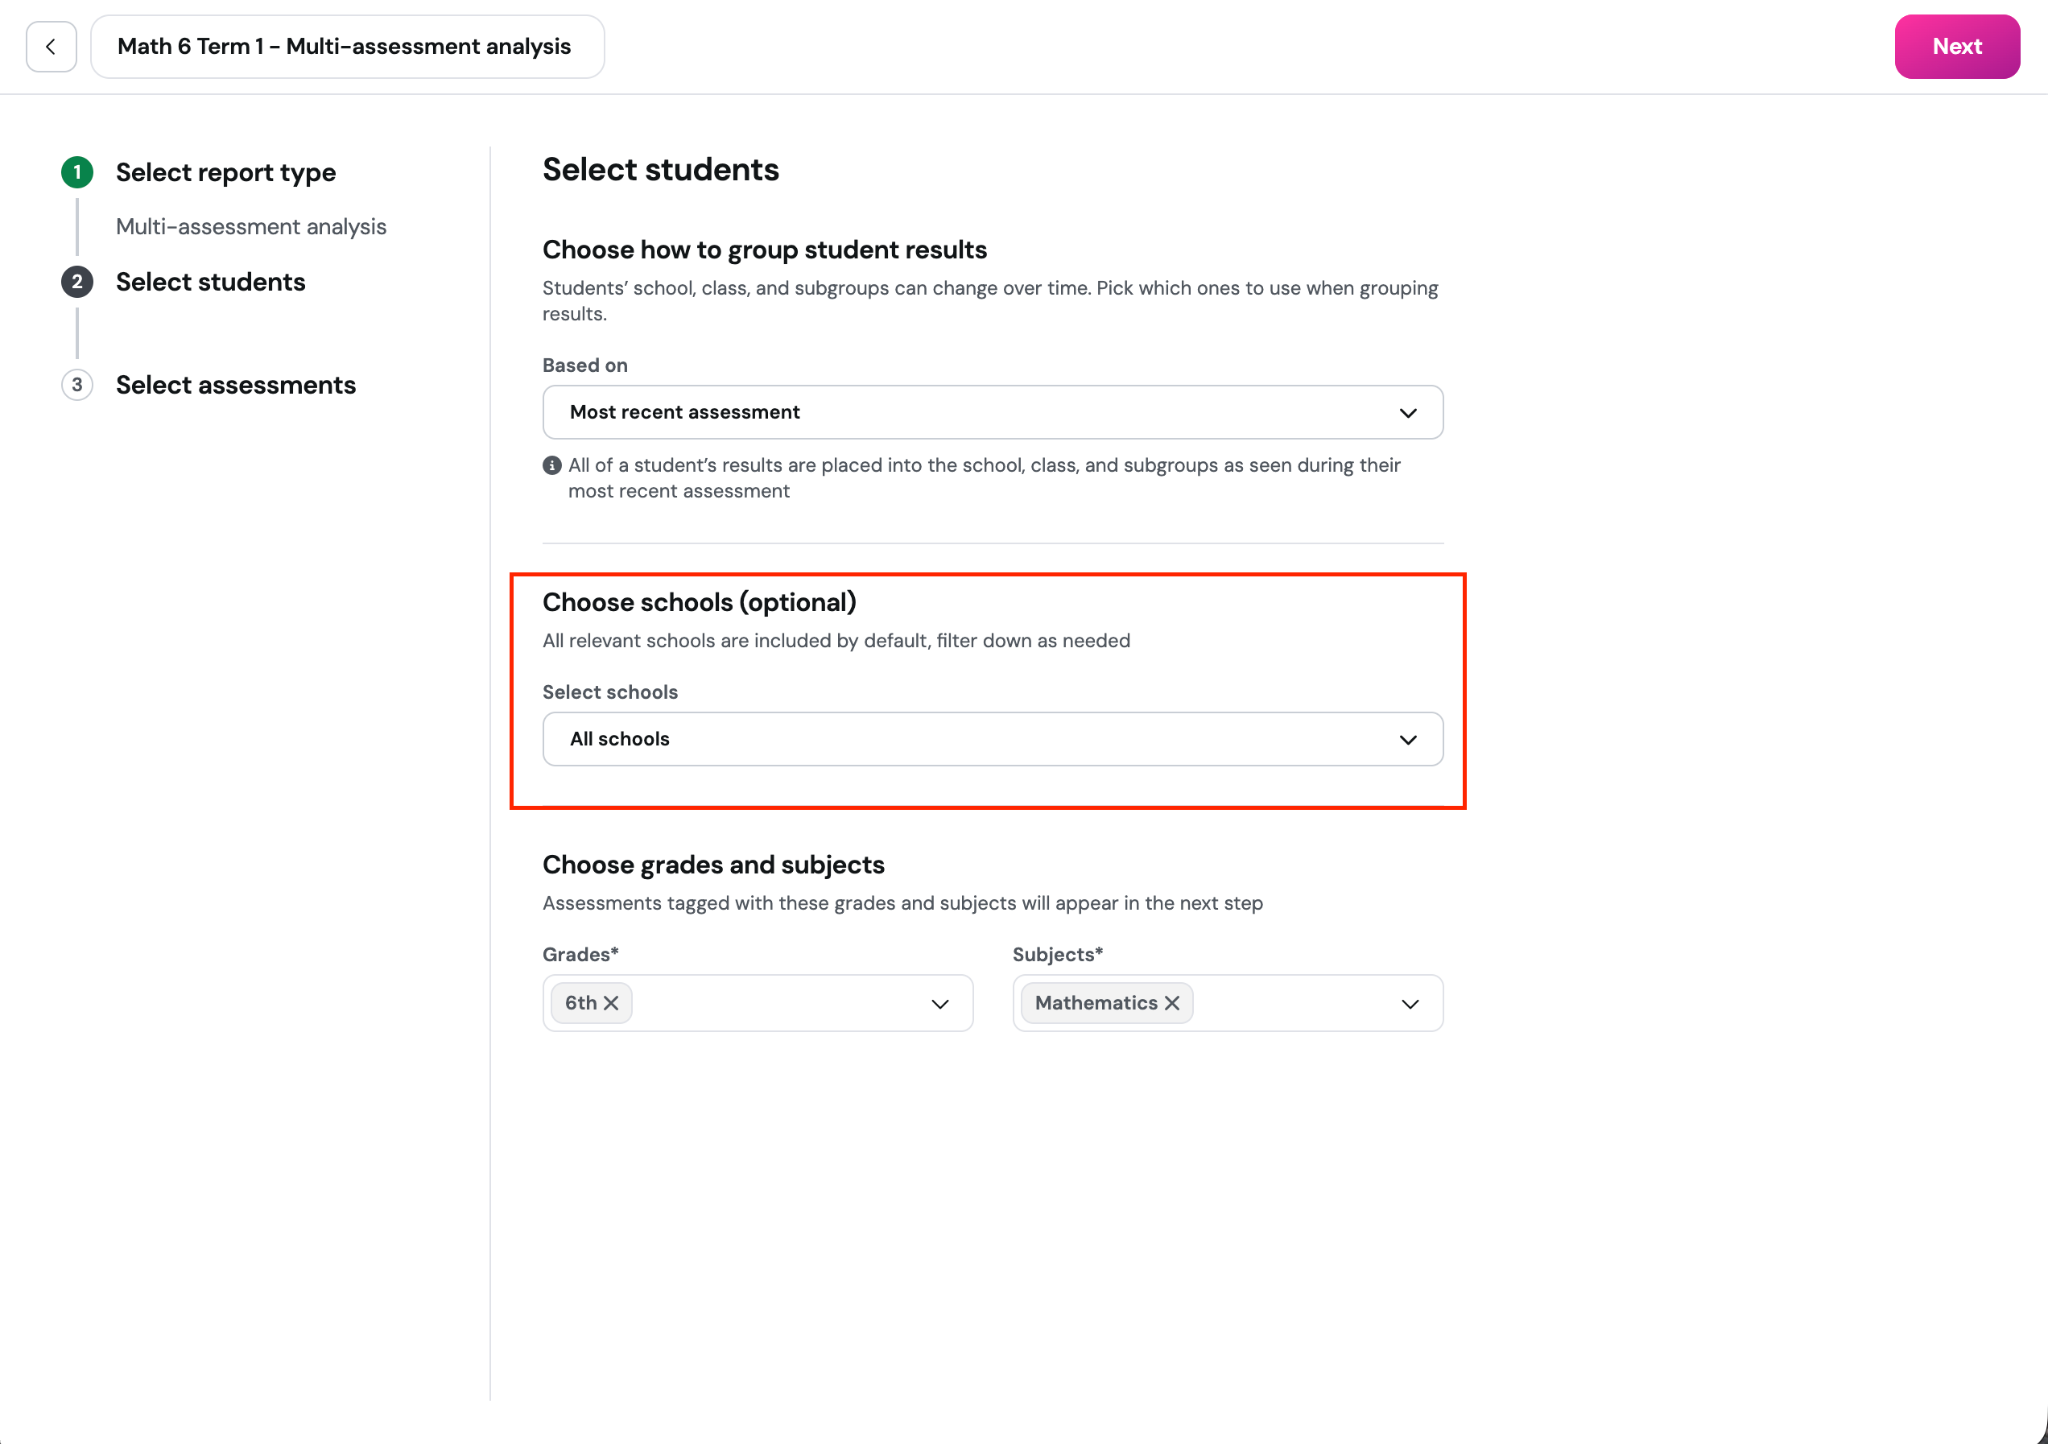
Step 2 - Part 2: Filter by schools and classes
Filtering is optional. Leave “All schools” selected to include every participating school. If you selected an SIS snapshot in the previous section, you can also filter by classes. Configured subgroup filters appear automatically in the completed report.
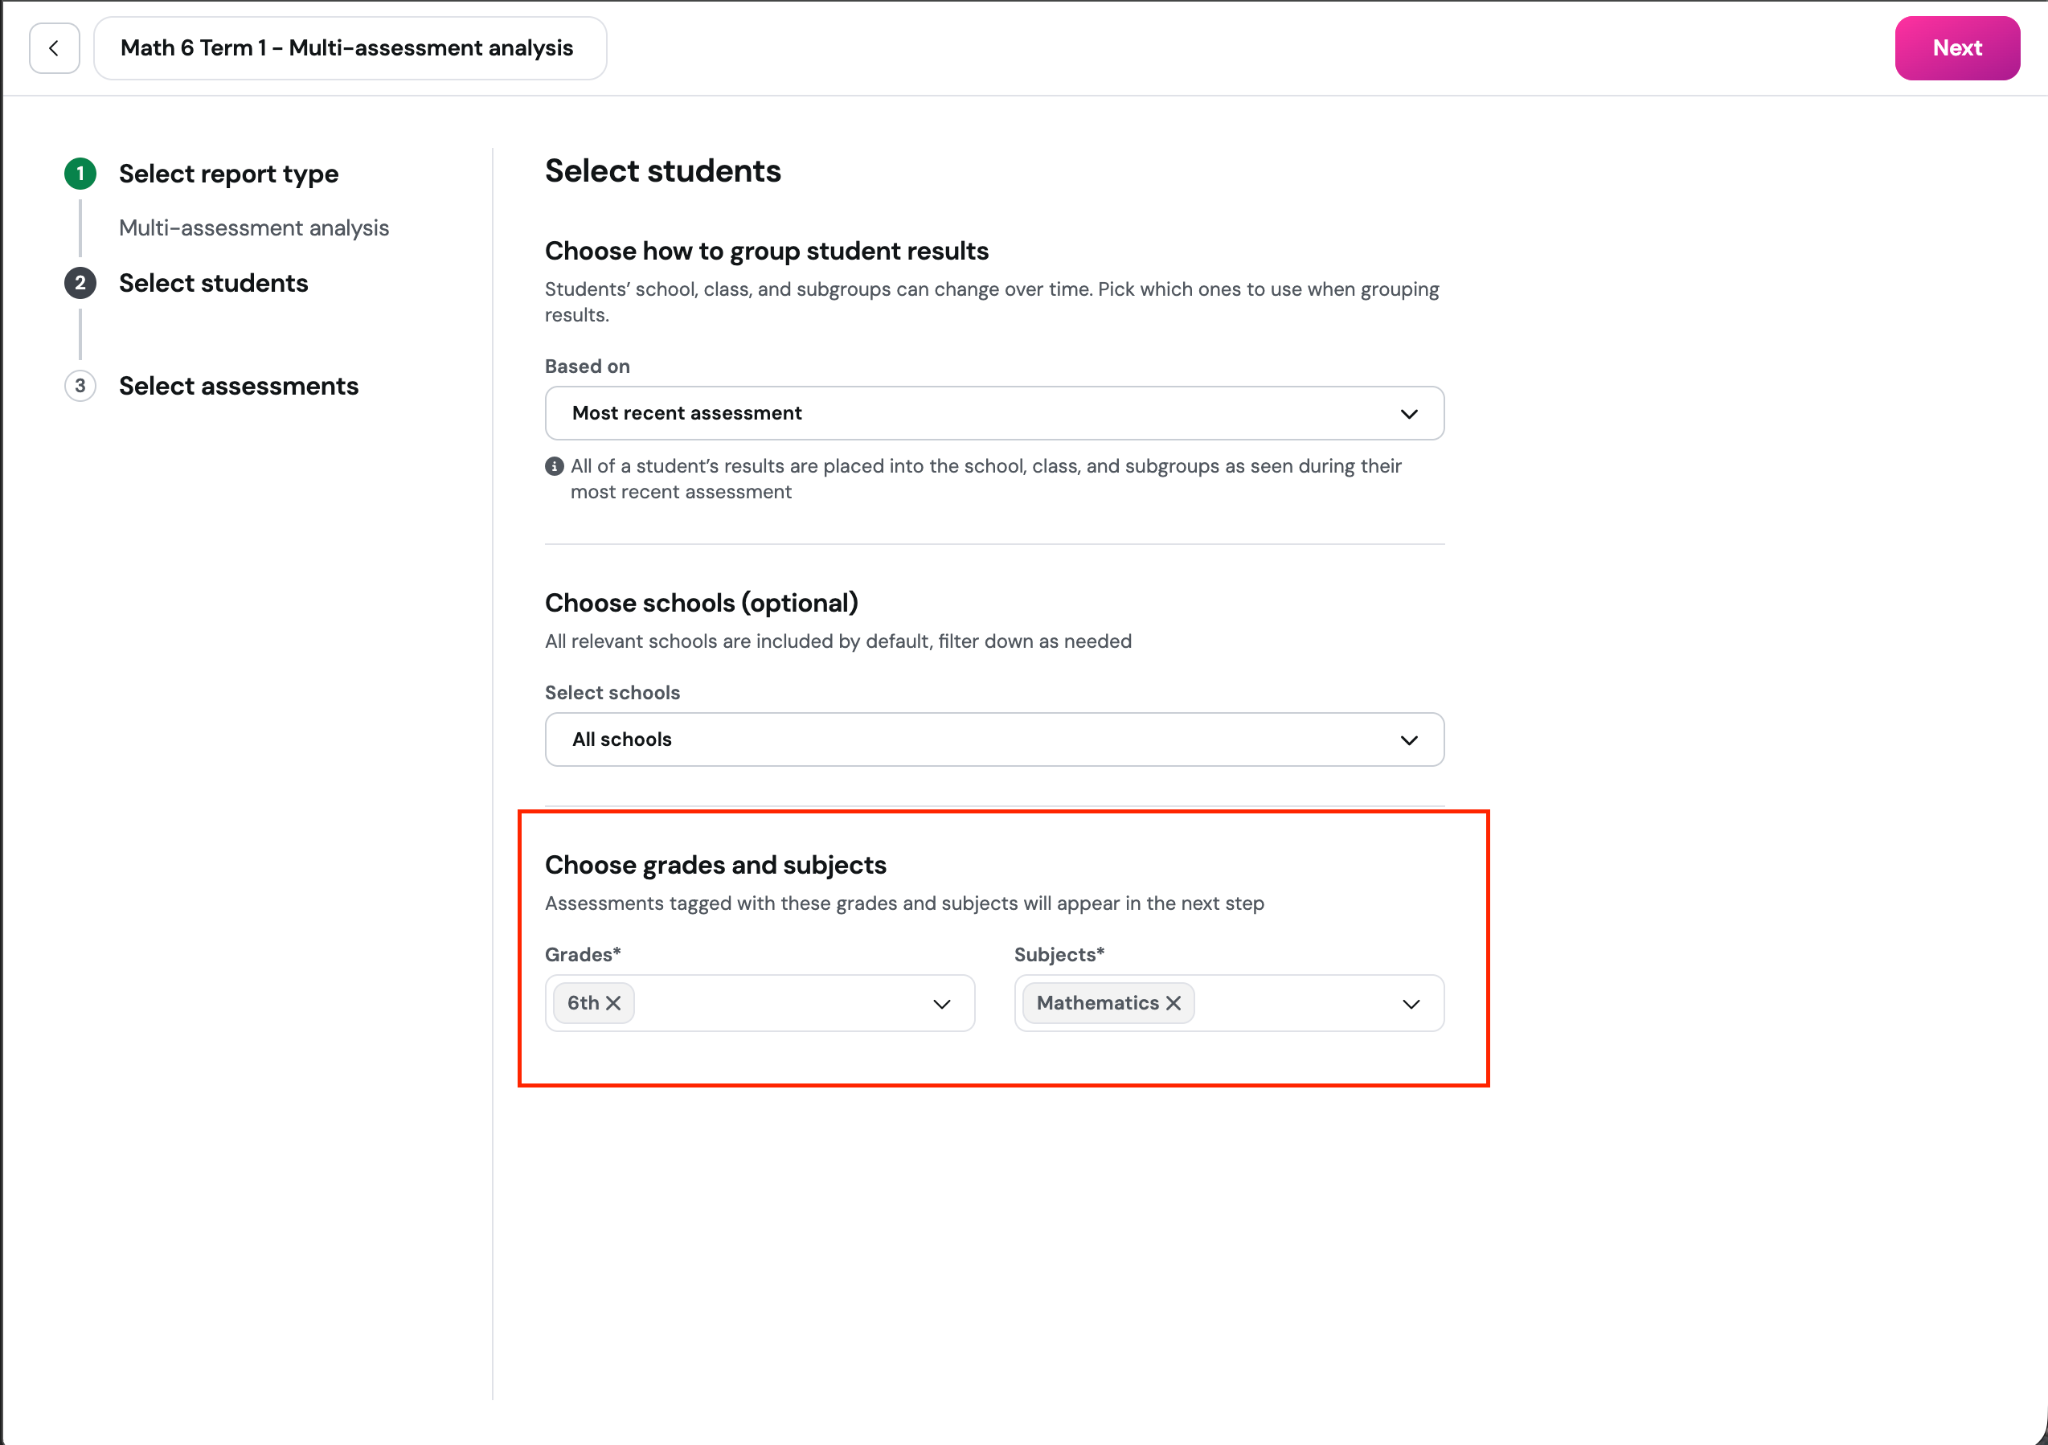
Step 2 - Part 3: Choose grades and subjects
These selections narrow the assessment list in the next step. Select the grade and subject for the report, then click Next.
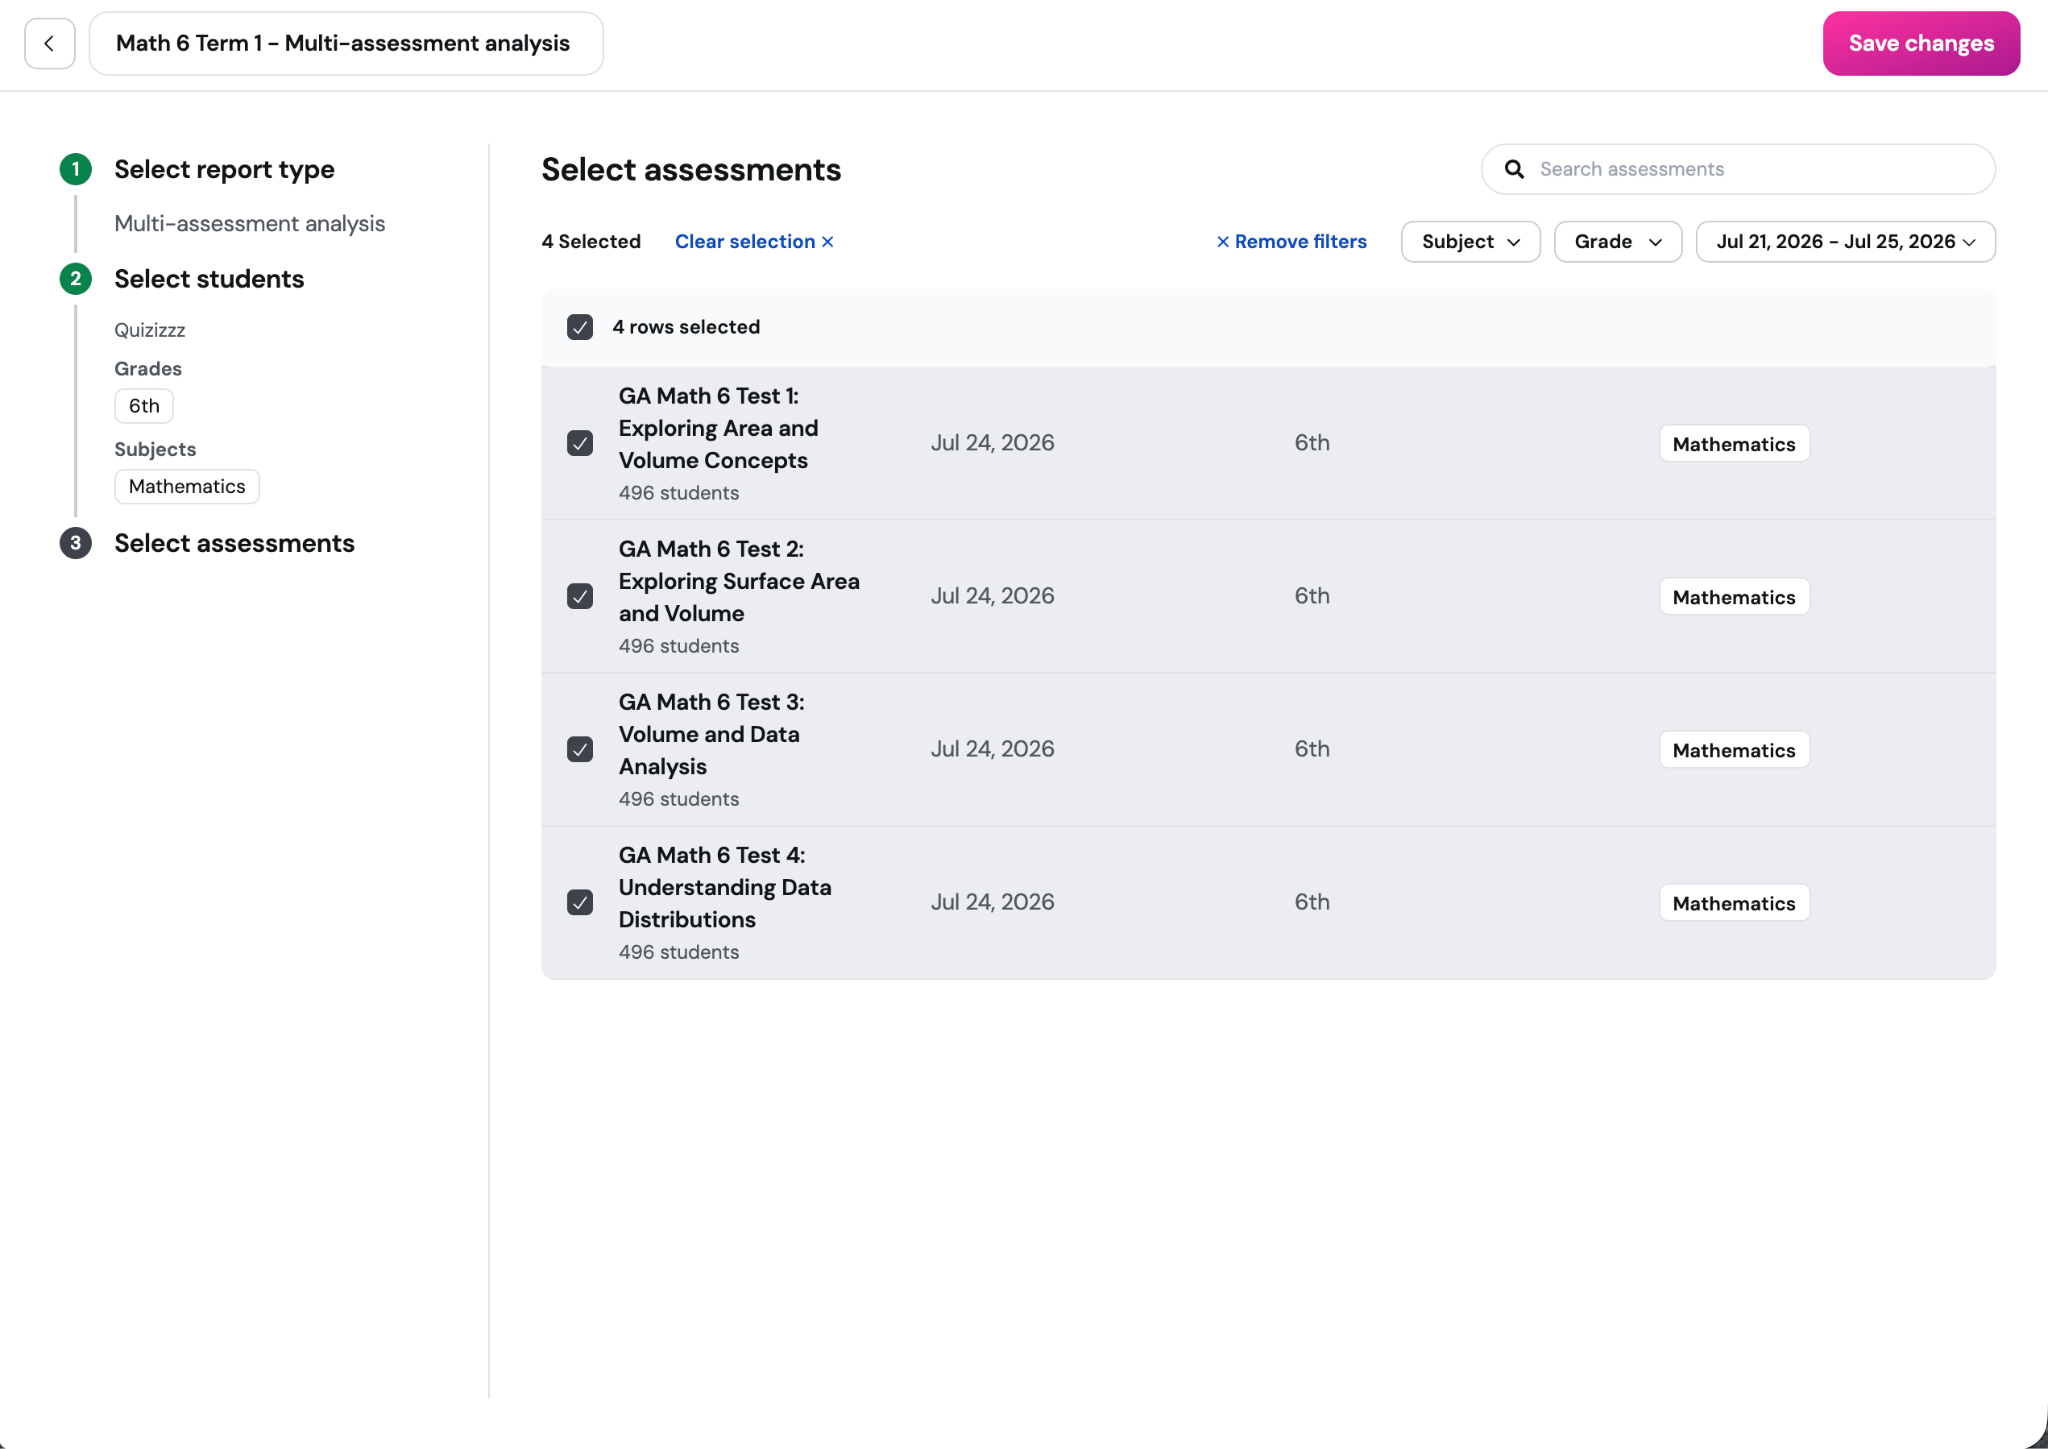
Step 3: Select assessments
Select at least two assessments that are related enough to interpret together. Common selections include assessments from the same grade and subject across one instructional cycle, a Wayground and external assessment covering similar content, or a related common assessment series.
Each assessment retains its own performance bands so its results remain grounded in that assessment’s context. This matters because assessments can differ in difficulty, rigor, and purpose. You can review each assessment’s bands in the completed report.
You can use the search bar or filters to find assessments faster. Once all relevant assessments are selected, then click Save.
Was this article helpful?
That’s Great!
Thank you for your feedback
Sorry! We couldn't be helpful
Thank you for your feedback
Feedback sent
We appreciate your effort and will try to fix the article